Note
OBS WebSocket v5+ and v4.9+ are both supported but the documentation is in v5+
¶ Prerequisites
If you are running OBS 28 or higher the WebSocket Plugin is pre-installed and the settings can be found on the top bar under Tools.

If you don't see the websocket settings and you have OBS 28+, go to Help > Verify Files
To enable remote control of your OBS Studio instance from Streamer.bot you must first install the OBS WebSocket Plugin
 Download OBS WebSocket obs-websocket v5+
After installing the plugin and restarting OBS, you should be able to configure your WebSocket Server settings as you wish:
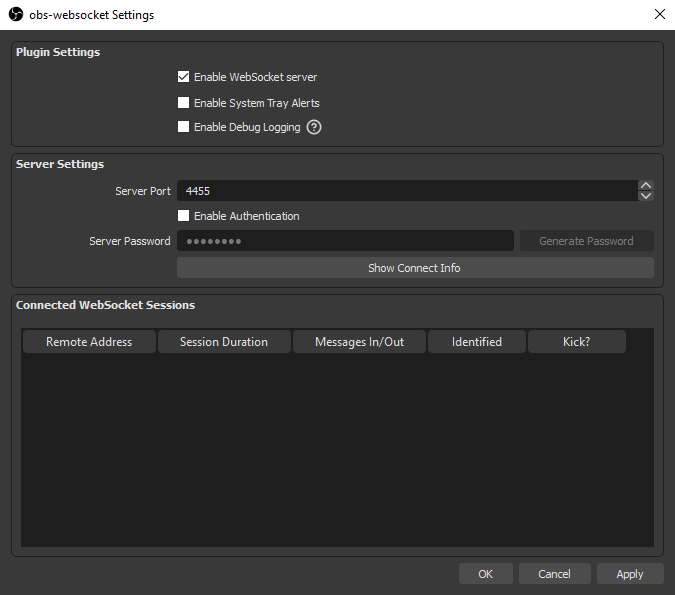
Later, you will need to match these settings in Streamer.bot
¶ Configuration
Once configured, connected OBS sessions will report their status on the OBS tab in Streamer.bot
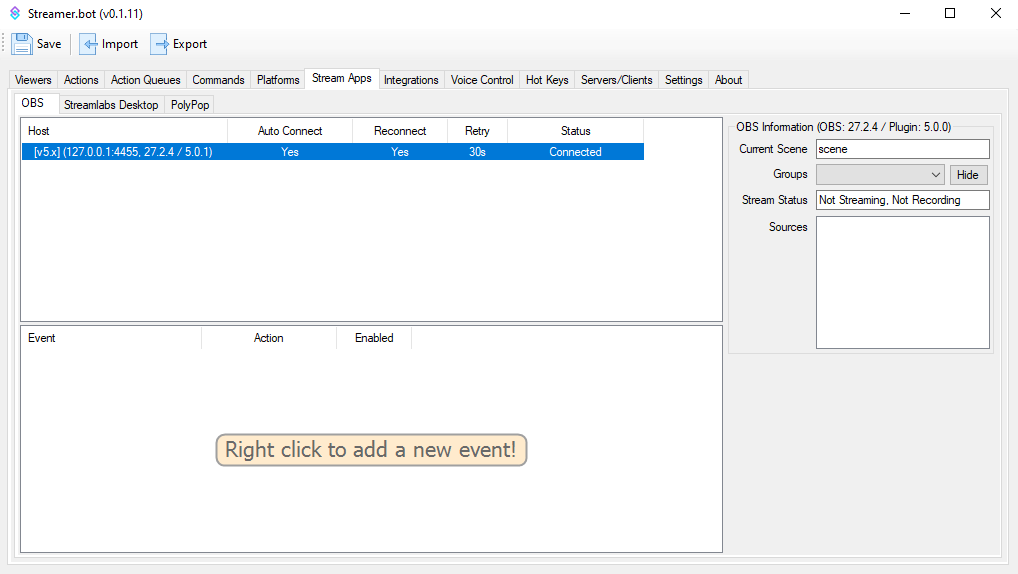
To add a new connection, Right-Click -> Add to open the new connection dialogue
Configuration options are outlined below:
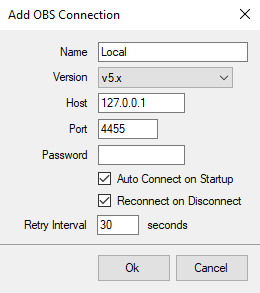
¶ Name
Enter any name or description for this OBS Studio connection
¶ Version
Please select which WebSocket Version you are wanting to use.
The default value is 4.9.x.
¶ Host
Enter the local IP address of your OBS Studio instance
The default value of 127.0.0.1 will find instances on the same PC
¶ Port
Enter the port set in OBS WebSocket Server settings earlier
The default value is 4455
¶ Password
Optional - Enter the password if you enabled authentication in OBS WebSocket Server settings earlier
¶ Auto Connect on Startup
Enable this option to automatically connect to OBS Studio when you start Streamer.bot
¶ Reconnect on Disconnect
Enable this option to automatically reconnect to OBS Studio if the connection is lost
¶ Retry Interval
Amount of time, in seconds, to wait between each reconnection attempt
If OBS isn't connecting, please double check the PORT, PASSWORD and VERSION to ensure that data is correct.